
- Speed & Reliability
- Value for money
- Professional adviser
- Committed to quality
Apparel
Attire that’s fit for both personal
and professional use.
Men's Clothing
We are proud to represent your brand in print and you will be proud to show it off.


Starting at $ 26.64

Starting at $51.51
Women’s Clothing
We are proud to represent your brand in print and you will be proud to show it off.


Kids' Clothing
We are proud to represent your brand in print and you will be proud to show it off.


Starting at $44.30
Drinkware
We are proud to represent your brand in print and you will be proud to show it off.


Starting at $36.25
Specialty
We are proud to represent your brand in print and you will be proud to show it off.


Starting at $15.17

Starting at $24.52
Print Products
We are proud to represent your brand in print and you will be proud to show it off.

Starting at $34.09

Starting at $10


Design your own
How does PRINTING.COOP work?

Step 1
Pick a product
Select a product from our catalog and get started with your custom design in just a few clicks

Step 2
Create your design
Upload your design, logo, or artwork and preview how it will look on your selected product.

Step 3
Ship it for you
We handle the printing and shipping, delivering your custom products quickly and professionally.
Printing Guides
Explore resources to help you find the best options for your print projects.

Binding Type References
Perfect Binding — Uses glues to hold pages to the spine. The spine is part of the front cover, the front cover is bent to create the spine and then the pages are glued to this small section. This means there is no seam between the front cover and the spine, creating a smoother, more aesthetic front edge. Perfect binding allows for better wrap-around printing.
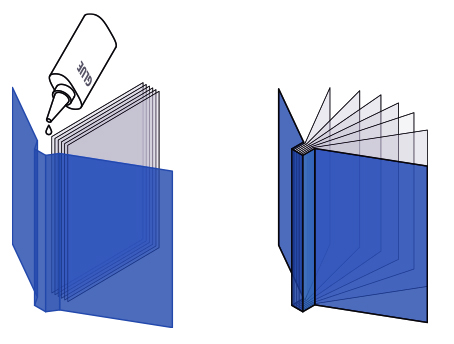
Commonly used for soft cover books like magazines, novels, financial reports, jourmals, and catalogs of all sizes.
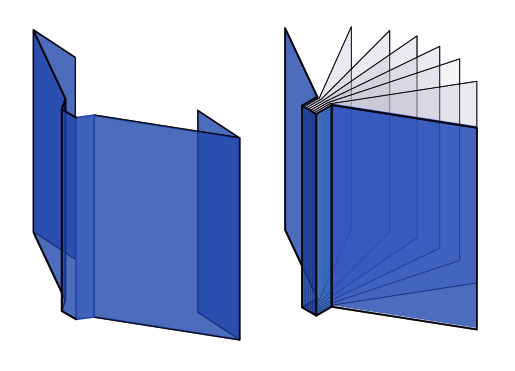
Saddle Stitch — The saddle stitch binding technique takes full sheets of paper, stapled together in the center. Then the pages, including the cover, are folded in half along the line of the staple. This method is eco-friendly since it uses no paper glue.
Commonly used for pamphlets and magazines with fewer than 100 pages.
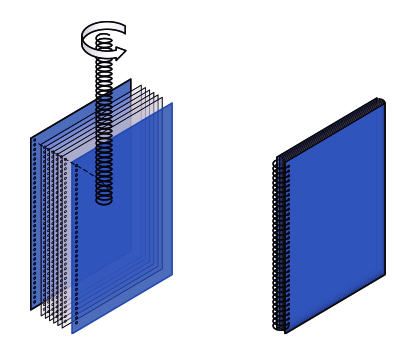
Spiral Binding — A continuous metal or plastic loop is inserted into punched holes along the spine. This binding allows books to lay flat when they are open, but the binding has to be cut off to add or remove pages from the document. Commonly used for reports, calendars, cookbooks and manuals.
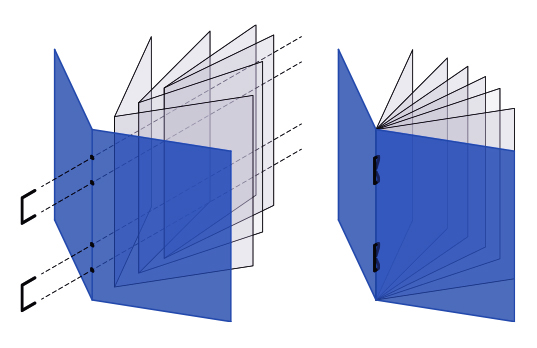
Hard Cover Binding (Case Binding) — Pages are sewn
together in sections and glued to the hardcover at
the spine.
Commonly used for documents withp age counts ranging from 60-400.
Dust Jacket — A removable paper cover, generally with a decorative design, used to protect a book from dirt or damage.
Densities & Finishing Guide
Densities
Color Density

Line Weights

Finishing
Rounded Corners


Drill Holes

Design Basic References
Design Basic References
Bleeds
When setting up your page, you’ll want to remember
to include a bleed. A bleed is when you let your colors,
images, and texts extend across the trim of the page.
This ensures there is no white margin (or border) around
the document after printing. When you are exporting
your document, remember to add 1/4 inch of space for
your bleed.

3.5″ x 2″ Business Card
 Safe Area Margin: keep all artwork or text within this area
Production Buffer: artwork or text in this area may get trimmed
Finished Size (3.5″ x 2″)
Bleed Area: artwork or text in this area will be cut off
Art Size (3.75″ x 2.25″)
Color
When preparing a document for print design, set the
color mode to CMYK. This stands for cyan, magenta,
yellow, and black. Be careful that your design software
isn’t set at RGB, which is used for the web. CMYK dates
back to the printing press when each color needed to be
applied separately. Now, printing is a little more efficient,
but due to the setup of our design software and printers,
the industry-standard still operates from a CMYK basis
to ensure the proper color is used.
Image Formats
The two major image formats you need to know about
are raster and vector. Each of these popular image file
formats has its own specifications.
Raster Graphics (Bitmaps) — are made up of rectangular
pixels. Each of them contains one color. They are
arranged in a grid to form the final image.
File formats for Raster:
• .tiff (Tagged Image File Format)
• .psd (Adobe Photoshop Document)
• .pdf (Portable Document Format)
• .jpg (Joint Photographics Expert Group)
• .png (Portable Network Graphic)
• .gif (Graphics Interchange Format)
• .bmp (Bitmap Image File)
Commonly used for:
• Pixel-based
• Best for photographs
• Shareability
• Large file sizes
Vector Graphics — Composed of paths to form different
shapes like polygons which eventually form the image.
Those paths are connected with dots, only visible
while editing.
File formats for Vector:
• .ai (Adobe Illustrator document)
• .eps (Encapsulated PostScript)
• .svg (Scalable Vector Graphic)
• .pdf (Portable Document Format; only when
saved from vector programs)
Commonly used for:
• Mathematical curves and lines • Smaller file sizes
• Logos, type, and geometric designs
File Format References

Raster Graphics
Raster graphics are made up of rectangular pixels. Each of them
contains one color. They are arranged in a grid to form the final image. Raster graphics are most commonly used for pixel-based, best photographs, web-based images, share ability and large file sizes
• .tiff (Tagged Image File Format)
Perfect for photos. Editable. High-quality for print, photos and graphics. Transparent. Large file size.
• .psd (Adobe Photoshop Document)
Native, layered documents. Editable to manipulate and retouch images. Create web images. Creating image-based artwork for InDesign.
• .png (Portable Network Graphic)
High quality images for web graphics. websites, banners and emails. Transparent. Compressed. Small file size.
• .gif (Graphics Interchange Format)
Perfect for web image and animations. Portible. Small files sizes under 150kb. For simple icons and web graphics.
• .bmp (Bitmap Image File)
Perfect for photos. Transparent. Editable. Large file size. Not scalable. For web and print.
• .jpg (Joint Photographics Expert Group)
Quick loading times. Non-transparent white background. Small file size. Non-editable, flat image. For web and print.
• .pdf (Portable Document Format)
All design previews. Final file for printers. Suitable for sharing. Transparent. Scalable. Editable. For print and web.

Vector Graphics
Vector graphics are composed of paths to form different shapes like polygons which eventually form the image. Those paths are connected with dots, only visible while editing. They are most commonly used for mathematical curves and lines, logos, type, and geometric designs and smaller file sizes.
• .ai (Adobe Illustrator document)
Original Illustrator file. Fully editable with multiple layers and objects. Create graphics, such as logos, illustrations or icons.
• .eps (Encapsulated PostScript)
Suitable for logo and print design. Vector logo for client, designer or printer. Resizable. Editable.
• .svg (Scalable Vector Graphic)
Suitable for logo, icon and illustration design. Transparent. High resolution. Editable. Scalable. For print.
• .pdf (Portable Document Format; only when
saved from vector programs)
Only when saved from vector programs. Final file for printers. Sharable. Scalable. Transparent. Downloadable. Editable. For print and web.
InDesign Files
Editing software used for laying out for multi-page documents, containing text, vector graphics and images. InDesign files are created for desktop publishing and layout applications.
• .indd (InDesign Document)
Page layout and typesetting for marketing and branding materials such as business cards, brochures and catalogs. Fully editable and layered.
Envelope Size & Reference guide
| Name | Envelope Size | Insert Size | |
|---|---|---|---|
|
COMMERCIAL  |
6-1/4 | 3.5″ x 6″ | 3.25″ x 5.75″ |
| 6-3/4 | 3.625″ x 6.5″ | 3.5″ x 6.25″ | |
| 8-5/8 | 3.625″ x 8.625″ | 3.5″ x 8.375″ | |
| 7 | 3.75″ x 6.75″ | 3.5″ x 6.5″ | |
| Monarch | 3.875″ x 7.5″ | 3.75 x 7.25 | |
| 9 | 3.875″ x 8.875″ | 3.75″ x 8.675″ | |
| 9 (Policy) | 4″ x 9″ | 3.75″ x 8.5″ | |
| 10 | 4.125″ x 9.5″ | 4″ x 9.25″ | |
| DL | 4.313″ x 8.625″ | 4.125″ x 8.375″ | |
| 11 | 4.5″ x 10.375″ | 4.25″ x 10.125″ | |
| 12 | 4.75″ x 11″ | 4.5″ x 10.75″ | |
| 14 | 5″ x 11.5″ | 4.75″ x 11.25″ | |
| 16 | 6″ x 12″ | 5.75″ x 11.75″ |
|
CATALOG  |
Name | Envelope Size | Insert Size |
|---|---|---|---|
| 1 | 6″ x 9″ | 5.75″ x 8.75″ | |
| 1-3/4 | 6.5″ x 9.5″ | 6.25″ x 9.25″ | |
| 3 | 7″ x 10″ | 6.75″ x 9.5″ | |
| 6 | 7.5″ x 10.5″ | 7.25″ x 10″ | |
| 8 | 8.25″ x 11.25″ | 8″ x 10.75″ | |
| 9-3/4 | 8.75″ x 11.25″ | 8.5″ x 10.75″ | |
| 10-1/2 | 9″ x 12″ | 8.75″ x 11.5″ | |
| 14-1/4 | 10″ x 15″ | 9.75″ x 14.5″ |
|
BOOKLET  |
Name | Envelope Size | Insert Size |
|---|---|---|---|
| 3 | 4.75″ x 6.5″ | 4.5″ x 6″ | |
| 4-1/2 | 5.5″ x 7.5″ | 5.25″ x 7″ | |
| 5 | 5.5″ x 8.125″ | 5.25″ x 7.625″ | |
| 6 | 5.75″ x 8.875″ | 5.5″ x 8.375″ | |
| 6-1/2 | 6″ x 9″ | 5.75″ x 9″ | |
| 6-5/8 | 6″ x 9.5″ | 5.75″ x 9″ | |
| 6-3/4 | 6.5″ x 9.5″ | 6.25″ x 9″ | |
| 7-1/4 | 7″ x 10″ | 6.75″ x 9.5″ | |
| 7-1/2 | 7.5″ x 10.5″ | 7.25″ x 10″ | |
| 9 | 8.75″ x 11.5″ | 8.5″ x 11″ | |
| 9-1/2 | 9″ x 12″ | 8.75″ x 11.5″ | |
| 10 | 9.5″ x 12.625″ | 9.25″ x 12.125″ |
|
ANNOUNCEMENT  |
Name | Envelope Size | Insert Size |
|---|---|---|---|
| A1 | 3.625″ x 5.125″ | 3.475″ x 4.875″ | |
| A2 | 4.375″ x 5.75″ | 4.25″ x 5.5″ | |
| A6 | 4.75″ x 6.5″ | 4.625″ x 6.25″ | |
| A7 | 5.25″ x 7.25″ | 5″ x 7″ | |
| A8 | 5.5″ x 8.125″ | 5.25″ x 7.75″ | |
| A9 | 5.75″ x 8.875″ | 5.5″ x 8.625″ | |
| A10 | 6″ x 9.5″ | 5.875″ x 9.25″ |
|
BARONIAL  |
Name | Envelope Size | Insert Size |
|---|---|---|---|
| 1 Bar | 3.625″ x 5.125″ | 3.475″ x 4.875″ | |
| 5 Bar | 4.125″ x 5.5″ | 4″ x 5.25″ | |
| 5-1/2 Bar | 4.375″ x 5.75″ | 4.25″ x 5.5″ | |
| 6 Bar | 4.75″ x 6.5″ | 4.625″ x 6.25″ | |
| 7 Bar | 5.25″ x 7.25″ | 5.125″ x 7″ | |
| 8 Bar | 5.5″ x 8.125″ | 5.375″ x 7.875″ | |
| 9 Bar | 5.75″ x 8.875″ | 5.625″ x 8.625″ | |
| 10 Bar | 6″ x 9.5″ | 5.875″ x 9.25″ |
|
SQUARE  |
Name | Envelope Size | Insert Size |
|---|---|---|---|
| 5 | 5″ x 5″ | 4.75″ x 4.75″ | |
| 5-1/2 | 5.5″ x 5.5″ | 5.25″ x 5.25″ | |
| 6 | 6″ x 6″ | 5.75″ x 5.75″ | |
| 6-1/2 | 6.5″ x 6.5″ | 6.25″ x 6.25″ | |
| 7 | 7″ x 7″ | 6.75″ x 6.75″ | |
| 7-1/2 | 7.5″ x 7.5″ | 7.25″ x 7.25″ | |
| 8 | 8″ x 8″ | 7.75″ x 7.75″ | |
| 8-1/2 | 8.5″ x 8.5″ | 8.25″ x 8.25″ | |
| 9-1/2 | 9.5″ x 9.5″ | 9.25″ x 9.25″ |
REMITTANCE
 |
Name | Envelope Size | Insert Size |
|---|---|---|---|
| 6-1/4 | 3.5″ x 6″ | 3.35″ x 5.75″ | |
| 6-1/2 | 3.5″ x 6.25″ | 3.25″ x 6″ | |
| 6-3/4 | 3.625″ x 6.5″ | 3.375″ x 6.25″ | |
| 9 | 3.875″ x 8.875″ | 3.625″ x 8.625″ |
Envelope Anatomy
Envelopes have a primary purpose: to securely carry its contents to its destination and to get opened. Below we have broken down the basic parts of the envelope in order for you to pick the best envelope for your project.
Common Seams
Center — Most commonly used on coin and catalog envelopes.
Diagonal — Used on commercials and pointed flap baronial.
Side — Provide a large area for printing on the back, as in the reverse face, collection and booklet envelopes.
Standard Flaps
The shape of the seal flap determines the envelope’s style, and ultimately its most appropriate use. Listed are the most common types of flaps

Top Seal Types
Re-moistening Seal — A gum seal activated by moistening
the flap for a permanent seal.
Split Seal — A gum seal split into sections and activated
by moistening the flap for a permanent seal; better for
storing envelopes in humid conditions.
Pressure Sensitive — Self-adhering latex adhesive applied
to two surfaces that seals on contact when joined.
Self-Adhesive — Release tape liner applied over a resin
adhesive pressure-sensitive seal. Remove liner and press
flap down to seal; no moisture required.
Clasp — Reinforced, double-pronged metal clasp for added security. Should not be run through automated processes after conversion.
String & Button — Tie-down closures ready for repeat opening or secured sealing.
Openings and What You Need To Know
End-openings are ideal for hand-insertion applications and catalogs, whereas side-openings can accommodate automatic-insertion applications. When in doubt, consult with your supplier and mail house prior to ordering your envelopes to determine what construction is compatible with their machines. The difference between catalog and booklet envelopes is that catalog envelopes open on the short side, while booklet envelopes open on the long side.

How to Measure Envelopes
Do a Pre-measurement Checklist
• Be sure the envelope is empty before you measure it.
• Place the envelope on a flat surface.
• Capture the measurements to the nearest one-sixteenth of
an inch.
Start Measuring
U.S. envelopes are always stated in inches with the
shortest dimension first.
• Measure with the flap at the top.
• Flap length is measured from the top fold score line to the tip of the flap.
• Seal gum is measured from the edge of the seal to where the gum line stops.
• Throat depth is measured from the top fold score line to the top of the bottom flap.
• The Side flap is measured from the side fold to its farthest point at the envelope center.

Window Envelopes
Size of a Window
• The standard window is 1-1/8 inches high and 4-1/2 inches wide and is placed 5/8 inch from the bottom edge of the envelope.
• In size 6-3/4 envelopes, the window is 7/8 inch from the left edge.
• In size 10 envelopes, the window is 7/8 inch from the left edge.
• On double window envelopes, the second window (designed for return information) is 1/2 inch from the top and left edges, and measures 3/4 inch high and 2-1/2 inches wide.
• Other window sizes and locations can be produced, if the window is:
• Not more than 1-1/2 inches high.
• Not more than 5 inches wide.
• At least 1/2 inch from the bottom edge of the envelope.
• At least 3/8 inch from any envelope edge.
How to Measure a Window Position
• Measure with the flap at the top.
• Window size is always stated as height x width.
• Window positions are always measured by their distance from the left edge of the envelope and the distance from the bottom.

Window Cover Material
• Must be made of a non-tinted clear or transparent material (e.g., cellophane or polystyrene).
• Must permit information, as viewed through the window material, to meet the print-contrast ratio standards to ensure efficient processing.
• Glassine may be used for window cover material.
• All edges of the window cover material must be glued securely to the envelope.
Folding Guide

Tri/Roll Fold — Sheet is creased twice to create six pages. The right hand panel is normally trimmed 2mm smaller depending on the paper weight to allow it to be folded neatly into the larger pages.
Example: Basic utility bill, which is folded in thirds
 Z Fold — A ‘Z’ fold is creased twice, using two parallel folds made in the opposite direction and creates a document resembling the letter Z. This creates 6 equally sized pages.
Example: Company brochure, flyers or menus
 Gate Fold — Sheet is creased twice to create 6 pages. The right and left pages are half the size of the center page. They fold inward to meet in the middle of the page.
Example: Gala invitation
 Bi Fold/Half Fold — Sheet is folded in half vertically. This creates 4 pages, frontcover, back-cover and two internal pages.
Example: Thank you card
Tent Fold — Sheet is folded in half horizontally creating four pages: front cover, back-cover and two internal pages.
Example: Place setting card
 Accordion Fold — Uses a series of alternating folds to create multiple panels of a similar size. The parallel pleats formed by the alternating folds resemble the expandable mid-section of an accordion musical instrument.
Example: Multi-page brochures
 French/Quarter Fold — A folding of a sheet printed on one side into four or more leaves so that the outside pages read consecutively.
Example: Brochures and pamphlets
 Map Fold — Paper is folded in half, then each panel is folded again in half in opposite directions. 8.5” x 14” is the standard brochure size for the parallel map fold.
Example: Maps
Fraction to Decimal Chart
| Inches | Millimeters | |
|---|---|---|
| 1/64 | .015625 | .3969 |
| 1/32 | .03125 | .7938 |
| 3/64 | .046875 | 1.1906 |
| 1/16 | .0625 | 1.5875 |
| 5/64 | .078125 | 1.9844 |
| 3/32 | .09375 | 2.3813 |
| 7/64 | .109375 | 2.7781 |
| 1/8 | .125 | 3.1750 |
| 9/64 | .140625 | 3.5719 |
| 5/32 | .15625 | 3.9688 |
| 11/64 | .171875 | 4.3656 |
| 3/16 | .1875 | 4.7625 |
| 13/64 | .203125 | 5.1594 |
| 7/32 | .21875 | 5.5563 |
| 15/64 | .234375 | 5.9531 |
| 1/4 | .250 | 6.3500 |
| 17/64 | .265625 | 6.7469 |
| 9/32 | .28125 | 7.1438 |
| 19/64 | .296875 | 7.5406 |
| 5/16 | .3125 | 7.9375 |
| 21/64 | .328125 | 8.3344 |
| 11/32 | .34375 | 8.7313 |
| 23/64 | .359375 | 9.1282 |
| 3/8 | .375 | 9.5250 |
| 25/64 | .390625 | 9.9219 |
| 13/32 | .40625 | 10.3188 |
| 27/64 | .421875 | 10.7157 |
| 7/16 | .4375 | 11.1125 |
| 29/64 | .453125 | 11.5095 |
| 15/32 | .46875 | 11.9063 |
| 31/64 | .484375 | 12.3032 |
| 1/2 | .500 | 12.7001 |
| Inches | Millimeters | |
|---|---|---|
| 33/64 | .515625 | 13.0969 |
| 17/32 | .53125 | 13.4938 |
| 35/64 | .546875 | 13.8907 |
| 9/16 | .5625 | 14.2876 |
| 37/64 | .578125 | 14.6844 |
| 19/32 | .59375 | 15.0813 |
| 39/64 | .609375 | 15.4782 |
| 5/8 | .625 | 15.8751 |
| 41/64 | .640625 | 16.2719 |
| 21/32 | .65625 | 16.6688 |
| 43/64 | .671875 | 17.0657 |
| 11/16 | .6875 | 17.426 |
| 45/64 | .703125 | 17.8594 |
| 23/32 | .71875 | 18.2563 |
| 47/64 | .734375 | 18.6532 |
| 3/4 | .750 | 19.0501 |
| 49/64 | .765625 | 19.4470 |
| 25/32 | .78125 | 19.8438 |
| 51/64 | .796875 | 20.2407 |
| 13/16 | .8125 | 20.6375 |
| 53/64 | .828125 | 21.0345 |
| 27/32 | .84375 | 21.4313 |
| 55/64 | .859375 | 21.8282 |
| 7/8 | .875 | 22.2251 |
| 57/64 | .890625 | 22.6220 |
| 29/32 | .90625 | 23.0188 |
| 59/64 | .921875 | 23.4157 |
| 15/16 | .9375 | 23.8126 |
| 61/64 | .953125 | 24.2095 |
| 31/32 | .96875 | 24.6063 |
| 63/64 | .984375 | 25.0032 |
| 1 | 1.00 | 25.4001 |
Mailing Guidelines
Standard Sizes:

The tip of the upper right of the mailing piece must touch the shaded area to be mailed at regular postage. A surcharge will be added to non-standard mail.*
Non-Standard First Class Mail:
A piece of First-Class or Third-Class Single Piece Rate mail weighing 1 ounce or less is non-standard if it exceeds any of the following size limits:
• Its length exceeds 11.5 inches
• Its height exceeds 6.125 inches
• Its thickness exceeds .25 inch
• Its aspect ratio (length divided by height) does not fall between 1″ to 1.3″ and 1″ to 2.5″
Letter-Size Mail Standards
(SCALED TO FIT)

Paper Types Guide
Types of Paper
Knowing how the coating of the paper you are printing on reacts with the ink will help in choosing the right paper for your project. There are all kinds of papers out there for you to choose, from uncoated text stock to coated cover stock, textured, and more.
Coated Paper
This paper has been coated with a surface sealant, typically clay, to impart certain qualities to the paper, including weight, surface gloss, smoothness, or reduced ink absorbency. The coating on the paper reduces dot gain by not allowing the ink to absorb into the paper. This allows for cleaner crisper printing, especially in photos, blends and fine details. Coated papers come in numerous options: gloss, satin, matte, and dull finish.
Paper Finishes Explained
Gloss — Paper with a high sheen. Gloss papers have less bulk and opacity and are typically less expensive than dull & matte paper of equal thickness. Gloss coatings reduce ink absorption, which gives the sheet an excellent color definition.
Satin — A less shiny coated finish. It has a lower gloss level than gloss finish, yet a higher gloss level than matte finish. Colors are sharp and vivid.
Matte — A non-glossy, flat looking paper with very little sheen. Matte papers are more opaque, contain greater bulk, and are higher in cost. The coating still keeps much of the ink from being absorbed by the paper, which produces excellent, vibrant color.
Dull — A smooth surface paper that is low in gloss. Dull coated paper can fall between matte and glossy paper depending on the manufacturer.
Uncoated Paper
Paper that has not been coated with a surface sealant is classified as uncoated. Since inks dry by absorbing into the paper, colors can appear muted.
Uncoated papers comprise a vast number of paper types and are available in a variety of surfaces, both smooth and textured. Some of the common types are wove, smooth, laid, linen, and eggshell.
Wove or Smooth — This is a non-textured smooth surface.
Laid — Created with textured lines on its surface. This finish is used mostly for business stationery elements, like letterhead, envelopes and business cards.
Linen — Similar to a laid finish, this paper has textured lines on the surface of the sheet, but they are finer and more regular than those that appear on a laid finish stock. This paper is also used frequently for business stationery.
Eggshell — A paper that has a slight tooth or texture, when looked upon closely you’ll see tiny peaks and valleys on the paper, like on an eggshell.
Coated One Side and Coated Two Sides
Coated one side, commonly referred to as C1S, is a paper that has a coating applied to only one side of the paper. Coated two sides, C2S, paper has a coating applied to both sides of the paper.
Tip: Use C1S for when you need to keep at least one side uncoated if the item will be written on, example, holiday cards
Cotton Paper
Also known as rag paper or rag stock paper, is made using cotton linters (fine fibers which stick to the cotton seeds after processing) or cotton from used cloth (rags) as the primary material. As a more environmental option, cotton paper is more durable for important documents. Cotton paper is typically graded as 25%, 50%, or 100% cotton.
Characteristics
Opacity — A paper’s opacity is determined by its weight, ingredients and absorbency. A paper’s opacity determines how much printing will show through on the reverse side of a sheet. Opacity is expressed in terms of its percentage of reflection. Complete opacity is 100% and complete transparency is 0%.
Finish/Smoothness — Paper smoothness refers to the amount of evenness the surface of the paper possesses. Factors that play into how smooth the finished paper is include the type of material used to make the paper and the surface, or finishing treatment it receives in the later phases of production. Finish or smoothness affects ink receptivity and ink holdout. The smoothness of paper is measured on the Sheffield scale, the higher the value, the rougher the sheet.
Brightness — The brightness of a sheet of paper measures the percentage of a wavelength of blue light it reflects. The brightness of a piece of paper is typically expressed on a scale of 1 to 100 with 100 being the brightest. The brightness of a paper affects readability, the perception of ink color and the contrast between light and dark hues.
Paper Weight Chart & Guide
When selecting paper stock for a project, it’s important to keep in mind the equivalents of each paper. The chart below will be able to tell you how thick the paper will be and guide you in making the right selection.
| Bond Ledger |
Text Book |
Cover Cardstock |
Index | Pt |
|---|---|---|---|---|
| 16 | 40 | 22 | 33 | 3.2 |
| 18 | 45 | 24 | 37 | 3.6 |
| 20 | 50 | 28 | 42 | 3.8 |
| 24 | 60 | 33 | 50 | 4.8 |
| 28 | 70 | 39 | 58 | 5.8 |
| 29 | 73 | 40 | 60 | 6 |
| 31 | 81 | 45 | 66 | 6.1 |
| 35 | 90 | 48 | 74 | 6.2 |
| 36 | 90 | 50 | 75 | 6.8 |
| 39 | 100 | 54 | 81 | 7.2 |
| 40 | 100 | 56 | 83 | 7.3 |
| 43 | 110 | 60 | 90 | 7.4 |
| 44 | 110 | 61 | 92 | 7.6 |
| 47 | 120 | 65 | 97 | 8 |
| 53 | 135 | 74 | 110 | 9 |
| 54 | 137 | 75 | 113 | 9 |
| 58 | 146 | 80 | 120 | 9.5 |
| 65 | 165 | 90 | 135 | 10 |
| 67 | 170 | 93 | 140 | 10.5 |
| 72 | 183 | 100 | 150 | 11 |
| 76 | 192 | 105 | 158 | 13 |
| 82 | 208 | 114 | 170 | 14 |
| 87 | 220 | 120 | 180 | 15 |
| 105 | 267 | 146 | 220 | 18 |
Paper Weight Guide
The weight of a paper refers to its thickness and is typically measured in pounds (such as 20#) and points (such as 10 pt). The higher the number, the thicker the paper for that “type” of paper. Paper weights in commercial printing can be very confusing. For example, a sheet of 20# bond (probably what you use on your inkjet printer) is about the same thickness as a sheet of 50# offset.
Listed below are attributes that factor into paper weight and thickness.
Attributes
Writing — A letterhead-weight stock, typically 24# or 28# writing, and often has a watermark.
Text — Is thicker than a writing paper, but not as thick as a cover paper (card stock). Text-weight paper is usually a 70#, 80# or 100# text.
Cover — Cover stocks are heavy in weight, rigid and not easily folded. Common weights for cover stocks include: 65#, 80#, 100#, 120#, and 12pt.
Bond — Bond paper is made up of cotton rags or cotton textile fibers, which gives it a thicker, more substantial texture. High-quality bond paper is composed of anywhere from 20% to 100% cotton rag fiber, which gives the paper its durability. This type of paper is stronger than paper which made solely from wood pulp. Because of its unique composition, bond paper has a specific weight. Bond paper weight (or thickness) is at least 20 lb bond weight or 50 lb text weight.
Grams Per Square Meter (GSM) — GSM is how manufacturers and printers identify the measurement of paper. The higher the GSM, the heavier and thicker the paper.
Tip: When in doubt, request a stock sample.
Things to Note
• A high wood fiber content can increase the thickness and weight of paper.
• To achieve certain visual and tactile results, some paper processors include additives to the pulp.
• The type of processing used can affect the density of the paper, with a higher-density pulp creating thinner paper and a lower-density pulp creating thicker paper.
Weight is important in print because the wrong weight of paper can lead to issues while printing. For example, if you choose a very light paper for a brochure, you may be able to see through the sheet which ruins the look of the print on both sides.
Understanding How to Use the Chart
Bond, Text, and Cover are usually in lb (#). Sometimes they can be referred to in points (pt).
Let’s say that the short run brochures offer:
• 100 lb. Gloss Book
• 100 lb. Matte Book
• 80 lb. Gloss Cover
• 80 lb. Matte Cover
• 80 lb. 100% Recycled Uncoated Text
• 80 lb. 100% Recycled Uncoated Cover
Numbers can be deceiving with paper weights, which is why it’s important to refer to the chart. For example, the 100 lb. book stock can equate to 54 lb cover, while the 80 lb. cover can equate to 146 lb. book. This means that the 80 lb. cover can be about 45% thicker than the 100 lb. book. The recycled 80 lb text (aka book) can be equivalent to roughly a 44 lb. cover. So the two recycled stocks, while the same weight, can be different thicknesses.
How to Read a Stock Name
Have you ever received a sample of paper stock and wondered what all the numbers and colors mean on the label?
Here is a guide to reading the stock label so you’re not left wondering.
Sample: 100# Neenah, Classic Crest, Cover, Solar White,
Smooth
| Basis Weight | 100# |
| Paper Mill | Neenah |
| Brand | Classic Crest |
| Weight Type | Cover |
| Color | Solar White |
| Finish | Smooth |
Sample: 80# Mohawk, Strathmore, Text, Bright White, Super Smooth
| Basis Weight | 80# |
| Paper Mill | Mohawk |
| Brand | Strathmore |
| Weight Type | Text |
| Color | Bright White |
| Finish | Super Smooth |
Printing Techniques Guide
Get to Know the Processes
Different print processes can help heighten your brand’s identity and marketing materials while attracting your target audience. To help you choose the right print process for your materials, we’ve broken them down so you can find the one best suited for your project.
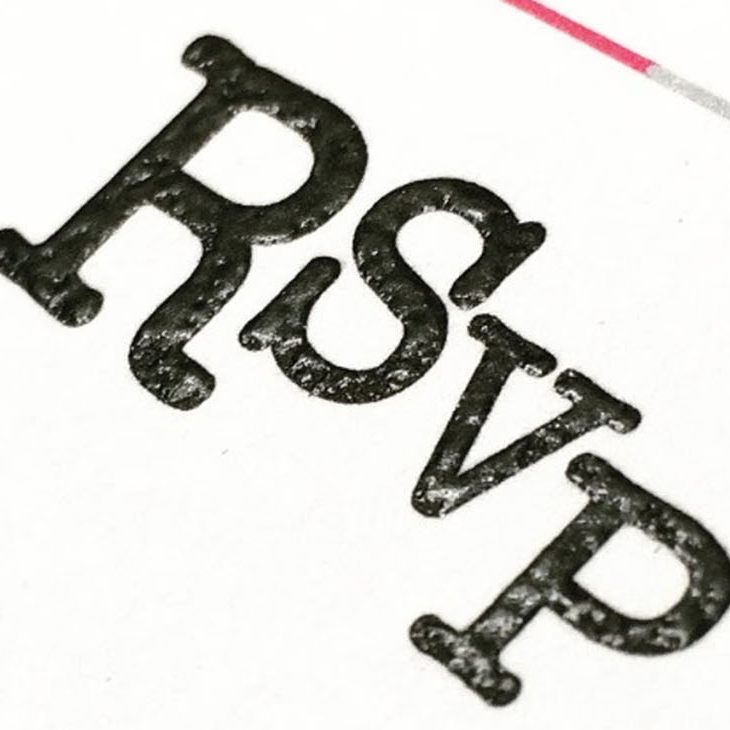
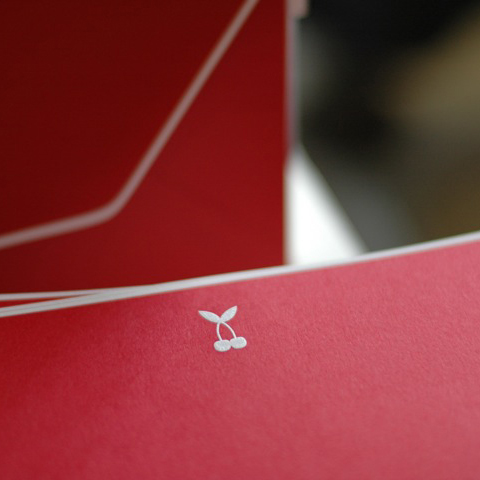 Engraving (Intaglio) — Type and graphics are etched into metal plates. The recessed images are then filled with engraving ink and paper is stamped under two tons of pressure per square inch resulting in a raised image with startling clarity, color purity and depth. This results in a “bruise” on the back side of the stock. It is often run on thick or duplex stocks.
Pro: Archival life. Perception of the highest degree of professionalism.
Con: 1 color per pass. Bruise on the back limits 2-sided content.
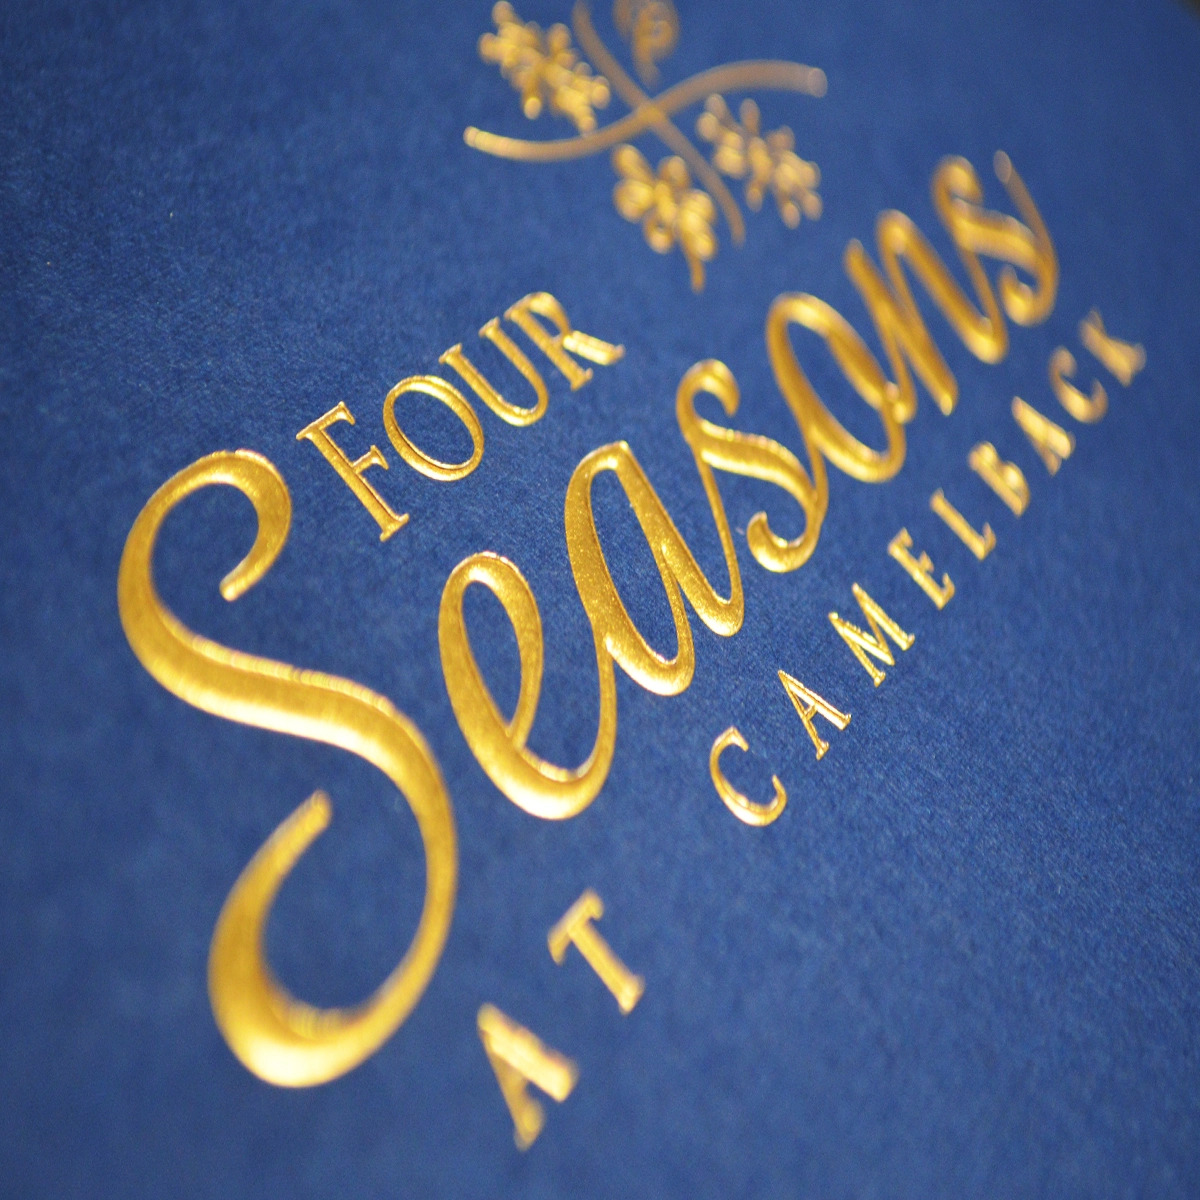 Foil Stamping — Uses heated metal dies to apply foil to paper. It creates reflective images and enables the use of light colors on dark stocks. Applied flat but is frequently combined with embossing to maximize impact. Available in dull or glossy finishes.
Pro: Prints on dark stock, document authentication, shiny metallic prestige.
Con: May not be laser printer compatible. Not ideal for fine type. Some stocks may cause peeling.
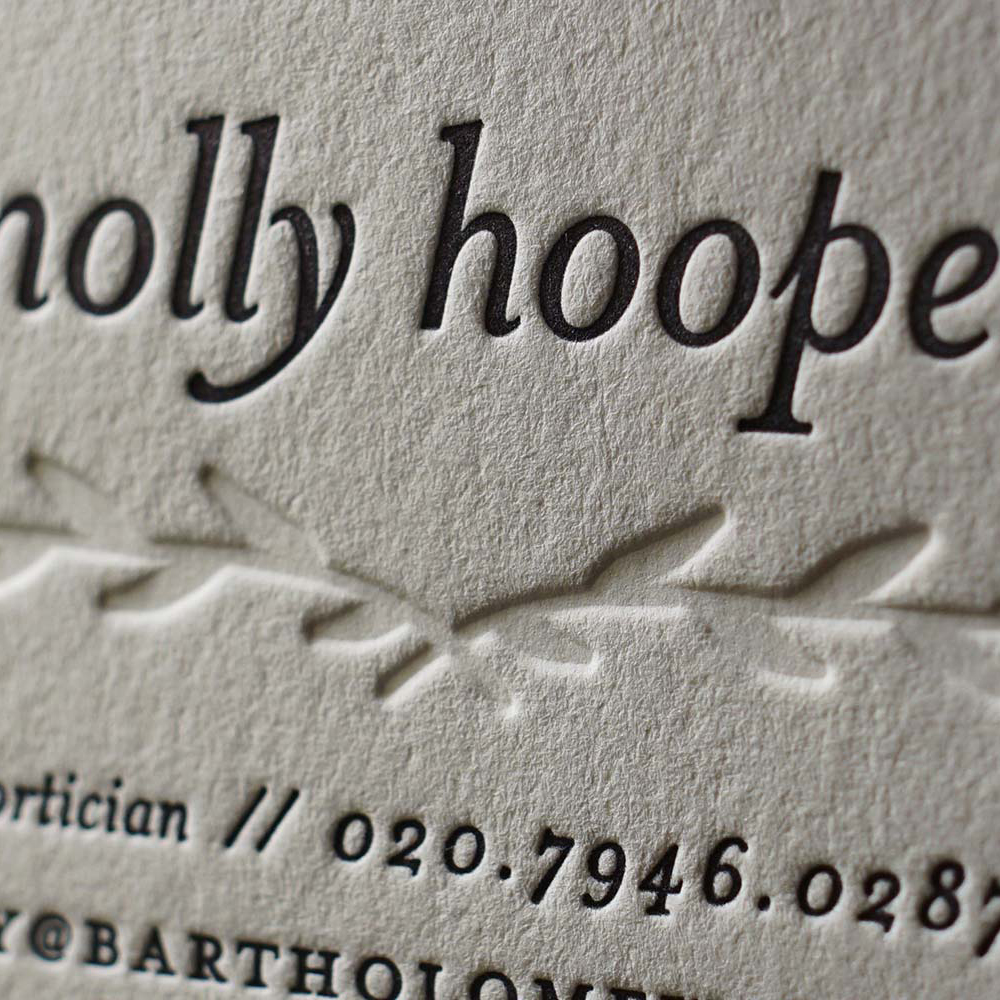 Letterpress (Typography) — Converts art and text into a rigid material (metal or photopolymer) which is used to print with any ink color. Yields recessed images which give a unique dimension and impression of a historical printing technique. Offers a handcrafted look and feel. Like engraving, it has a very tactile quality with a slight debossing effect where ink is laid.
Pro: Handcrafted look and feel.
Con: 1 color per pass. Very fine type may break up, solid ink coverage can appear uneven, and print area is limited to 8×10.
Tip: Do not use coated paper due to potential of ink offsetting to back of sheet. A heavyweight but soft paper will give the best results
 Embossing and Debossing — Embossing adds dimension by using a metal die to raise the paper. Debossing is achieved by using a reversed out metal die to stamp (recess) the image into the paper. Both embossing and de-bossing can create elegant and subtle multi-dimensional images.
• Blind Emboss – embossed image on paper without ink
• Registered Emboss – embossed image is registered with an ink printed image
• Foil Emboss – image has foil and embossing using a single brass die. Also known as hot leaf emboss (HLE).
Pro: Enhanced visual appeal and elegance. Ideal for large quantity orders that require a foil and embossed image b/c only a single press pass is needed.
Con: Multi-level embossing may jam in office printers. Die cost.
Tip: Avoid fine lines.
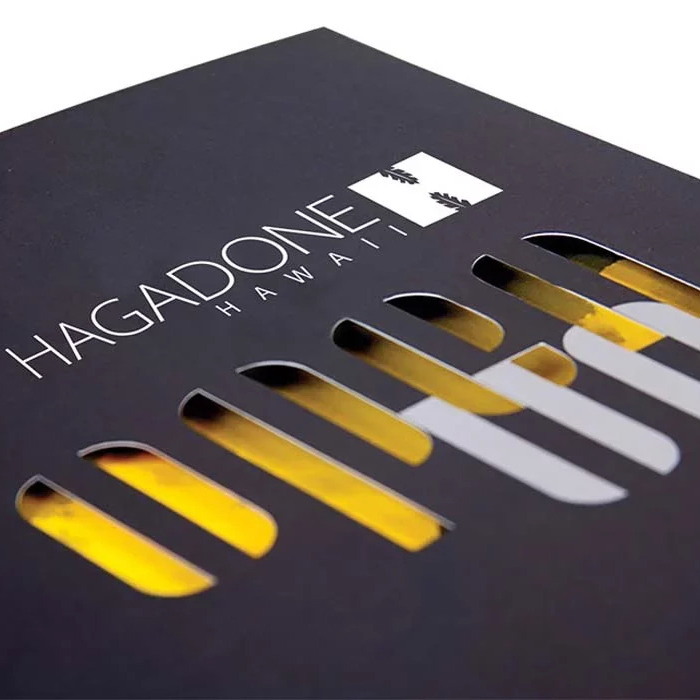 Die-cutting — A die is a thin, razorsharp steel blade that allows multiple pieces of paper to be formed into a specific shape or pattern.
Both custom dies and common cut/ shape dies are available. Dies can shape the entire perimeter, just one corner or edge, or cut out a shape from within the center of a piece. Die can be designed to create perforation.
Pro: Unique edges and patterns.
Con: Can require a knockout tab. May have a long
lead-time.
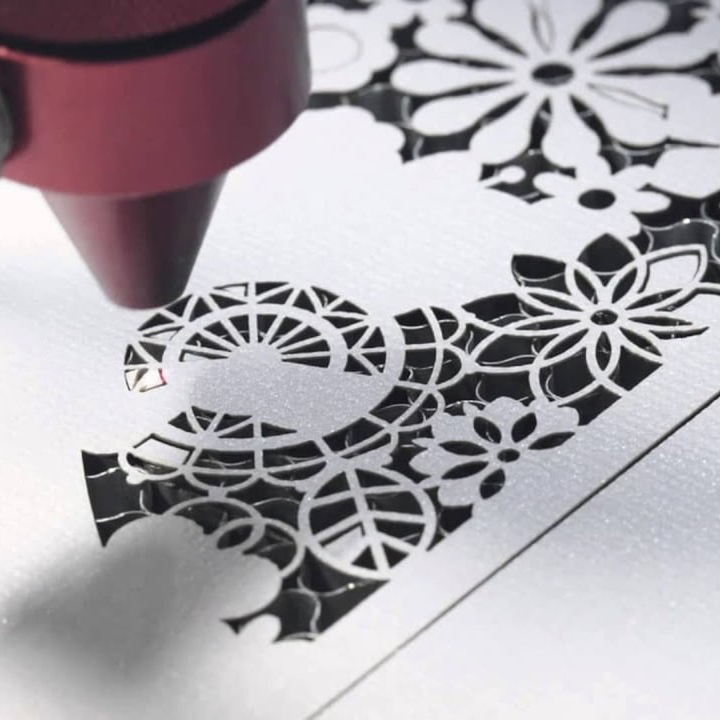 Laser Cutting — Process where a laser beam burns through the surface of your substrate to leave a high-quality intricate design.
Pro: Ideal for cutting out hand-written text, lace-like creations, rounded edges or shapes.
Con: Tiny flames are created by the precise lasers which may leave a slightly burnished edge.
 Offset Lithography (Flat Printing) — Image produced using flexible aluminum, polyester, Mylar or paper printing plates. Image is laser image on a plate by Computer-To-Plate technology, known as a plate setter. The plate is affixed to a cylinder. Dampening rollers apply water covering the blank areas and allowing only the ink to adhere to the image area on the inking rollers. The ink is transparent. When printing on colored stocks, it changes the color of the ink.
Pro: High speed and larger sheet size for a lower cost.
Con: More set-up for complexity and longer turn time.
 Digital Lithography (Flat Printing) — Uses CMYK inks. Digital printing eliminates many steps associated with traditional printing and can provide cost savings over offset lithography.
Artwork – digital files preferred. Can be submitted in all major software types of files. It is ideal for booklets, brochures and other literature.
Pro: Great for a short run, print on demand with no inventory. Easy copy change. Full-color proofs.
Con: Not all PMS colors can be matched in CMYK.
 Thermography (Raised Print) — In either matte or dull for a shiny surface appearance. A plastic resin powder is dusted over “wet” lithography ink and the combination is heated to fuse together, causing the resin to swell and create tactility. Avoid using fine type, serif typefaces and extremely detailed artwork with small features
Pro: Raised printing. Up to 2 colors per run, 9×10 image area.
Con: Shiny pockmarked solids. Very thin type may not rise. May not be laser printer compatible.
Laser Raise (raised print) — same as above, but special resin used in conjuncture with an ultra violet light cures the resin to a hardness that makes the raised print compatible with laser printers
Additional Processes and Finishing
Silk Screen — The process of transferring a stenciled design onto a flat surface using a mesh screen, ink, and a squeegee.
Sleeking — An on-demand foil solution for short-run digital applications. To transfer the foil to paper, sleeking uses pressure and heat that specifically bonds to digital ink and some toners.
Pro: No dies are needed.
Con: Paper selection may be limited. Sleeking technology can apply a simple finish, such as gloss or matte, a metallic background, such as gold or silver, or a dramatic holographic impression in spot locations or full coverage.
Spot Gloss — The process of applying a high gloss UV coating to a selected area on a printed piece. A common use of spot UV is to draw attention to a certain area of the printed piece.
Gilded (Painted) and Foiled Edge — Using engraving ink or metallic spray paint to color the edges of the paper.
Mounting (Pasted) Cards — Gluing multiple pieces of paper together to create one thicker sheet.
Burnishing — Flattening or raising the texture of metallic engraving ink depending on the type of die used.
Lamination — Lamination is a finishing process where a thin layer of plastic film is applied to paper or cardstock. Its primary goal is to enhance the durability and appearance of printed materials.
Matt Lamination — A smooth, non-reflective finish that softens glare while giving your print a refined, professional feel.
Soft-Touch Lamination — A velvet-style coating that creates a soft, tactile surface with a premium, high-end look.
Gloss Lamination — A sleek, glossy layer that boosts colour depth and contrast for bold, high-impact designs.
Scoring — The process of making a crease in paper or cardboard, so it will fold easily. Scoring helps improve the appearance of the fold because it provides a consistent guideline and reduces the potential for the paper to buckle or crack. Scoring finish is also less likely to cause harm to toner-type inks or thick color coats.
Perforating — A procedure that creates a series of very fine holes in paper or card stock, usually along a straight line, to allow a portion of the printed piece to be easily detached by hand. Used for a variety of purposes, such as coupons, response cards, and remittance slips.
Centre — A single perforated line positioned through the middle for clean, easy separation.
Ticket — One perforated line set at the right-hand third, ideal for tear-off sections.
Numbering — Involves the printing of ascending or descending identification numbers so that each printed unit receives its own unique number. This unique number can appear in one position, or in multiple positions, on each document. Frequently used on contracts, invoices, purchase orders, quote forms, checks, raffle tickets and more.
Collating — The action of taking multiple different printed pages and putting them together into a complete set.
Padding — Applying a flexible adhesive along one edge of a stack of same-sized sheets. The adhesive secures the sheets as a unit, but allows the topmost sheet to be easily removed as needed. In most cases, padded sheets incorporate a chipboard backer for rigidity. Common examples include notepads, memo pads, and order pads.
3-Hole Drilling — refers to the process of creating round holes in paper using a rotating bit, such as the hole patterns needed for sheets and dividers placed into ringed binders.
Different Media Guides
Types of Materials
Knowing what your needs are will help in choosing the right materials for your project. We offer different kinds depending on your specifications.
Correx® by Corplex
 Correx® by Corplex is a versatile and sustainable signage solution, ideal for cost-effective yet durable displays. Made from lightweight polypropylene with a corrugated inner, it offers strength and stability while remaining easy to transport and install. Its robust design makes it perfect for indoor and outdoor use, commonly seen in estate agent boards, building site signage, and short-term promotions.
Correx® stands out for its ecofriendly qualities. Fully recyclable and manufactured in the UK, it’s a smart choice for those seeking sustainable solutions. Durable yet lightweight, Correx® offers a reliable option for temporary signage that minimises environmental impact.
Sizes available
Custom sizes available.
A0 33.11″ x 46.81″
A1 23.39″ x 33.11″
A2 16.54″ x 23.39″
A3 11.69″ x 16.54″
A4 8.27″ x 11.69″
20×30 20″ x 30″
40×30 40″ x 30″
60×40 60″ x 40″
Stock Options
9/64″ White Fluted Correx® by Corplex
Aluminium Composite
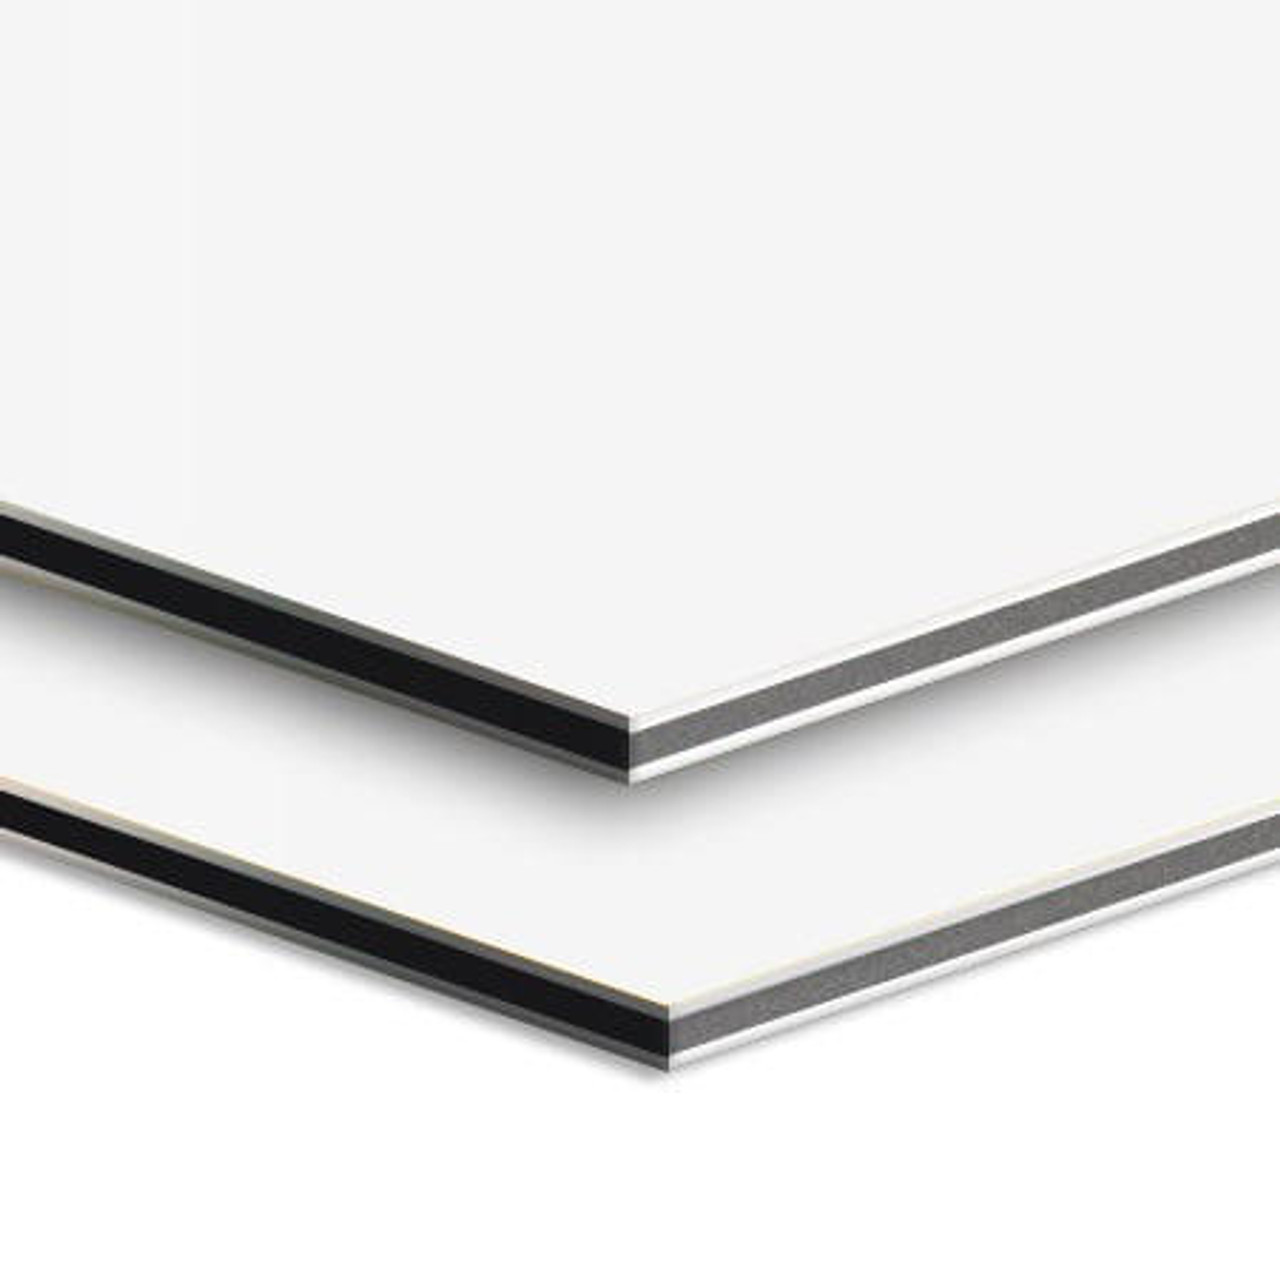 Aluminium composite signs are a durable and versatile solution for both indoor and outdoor use. Made with a polyethylene core between two aluminium sheets, they are strong yet lightweight, making them ideal for permanent fixtures. With a professional finish, these signs ensure branding remains sharp and impactful, even in tough conditions, offering long-lasting performance for any business.
Sizes available
Custom sizes available.
A0 33.11″ x 46.81″
A1 23.39″ x 33.11″
A2 16.54″ x 23.39″
A3 11.69″ x 16.54″
A4 8.27″ x 11.69″
20×30 20″ x 30″
40×30 40″ x 30″
60×40 60″ x 40″
Stock Options
1/8″ Aluminium Composite
Corner Options
Square
Rounded
Additional Finishing
Drilled
Foam Signs
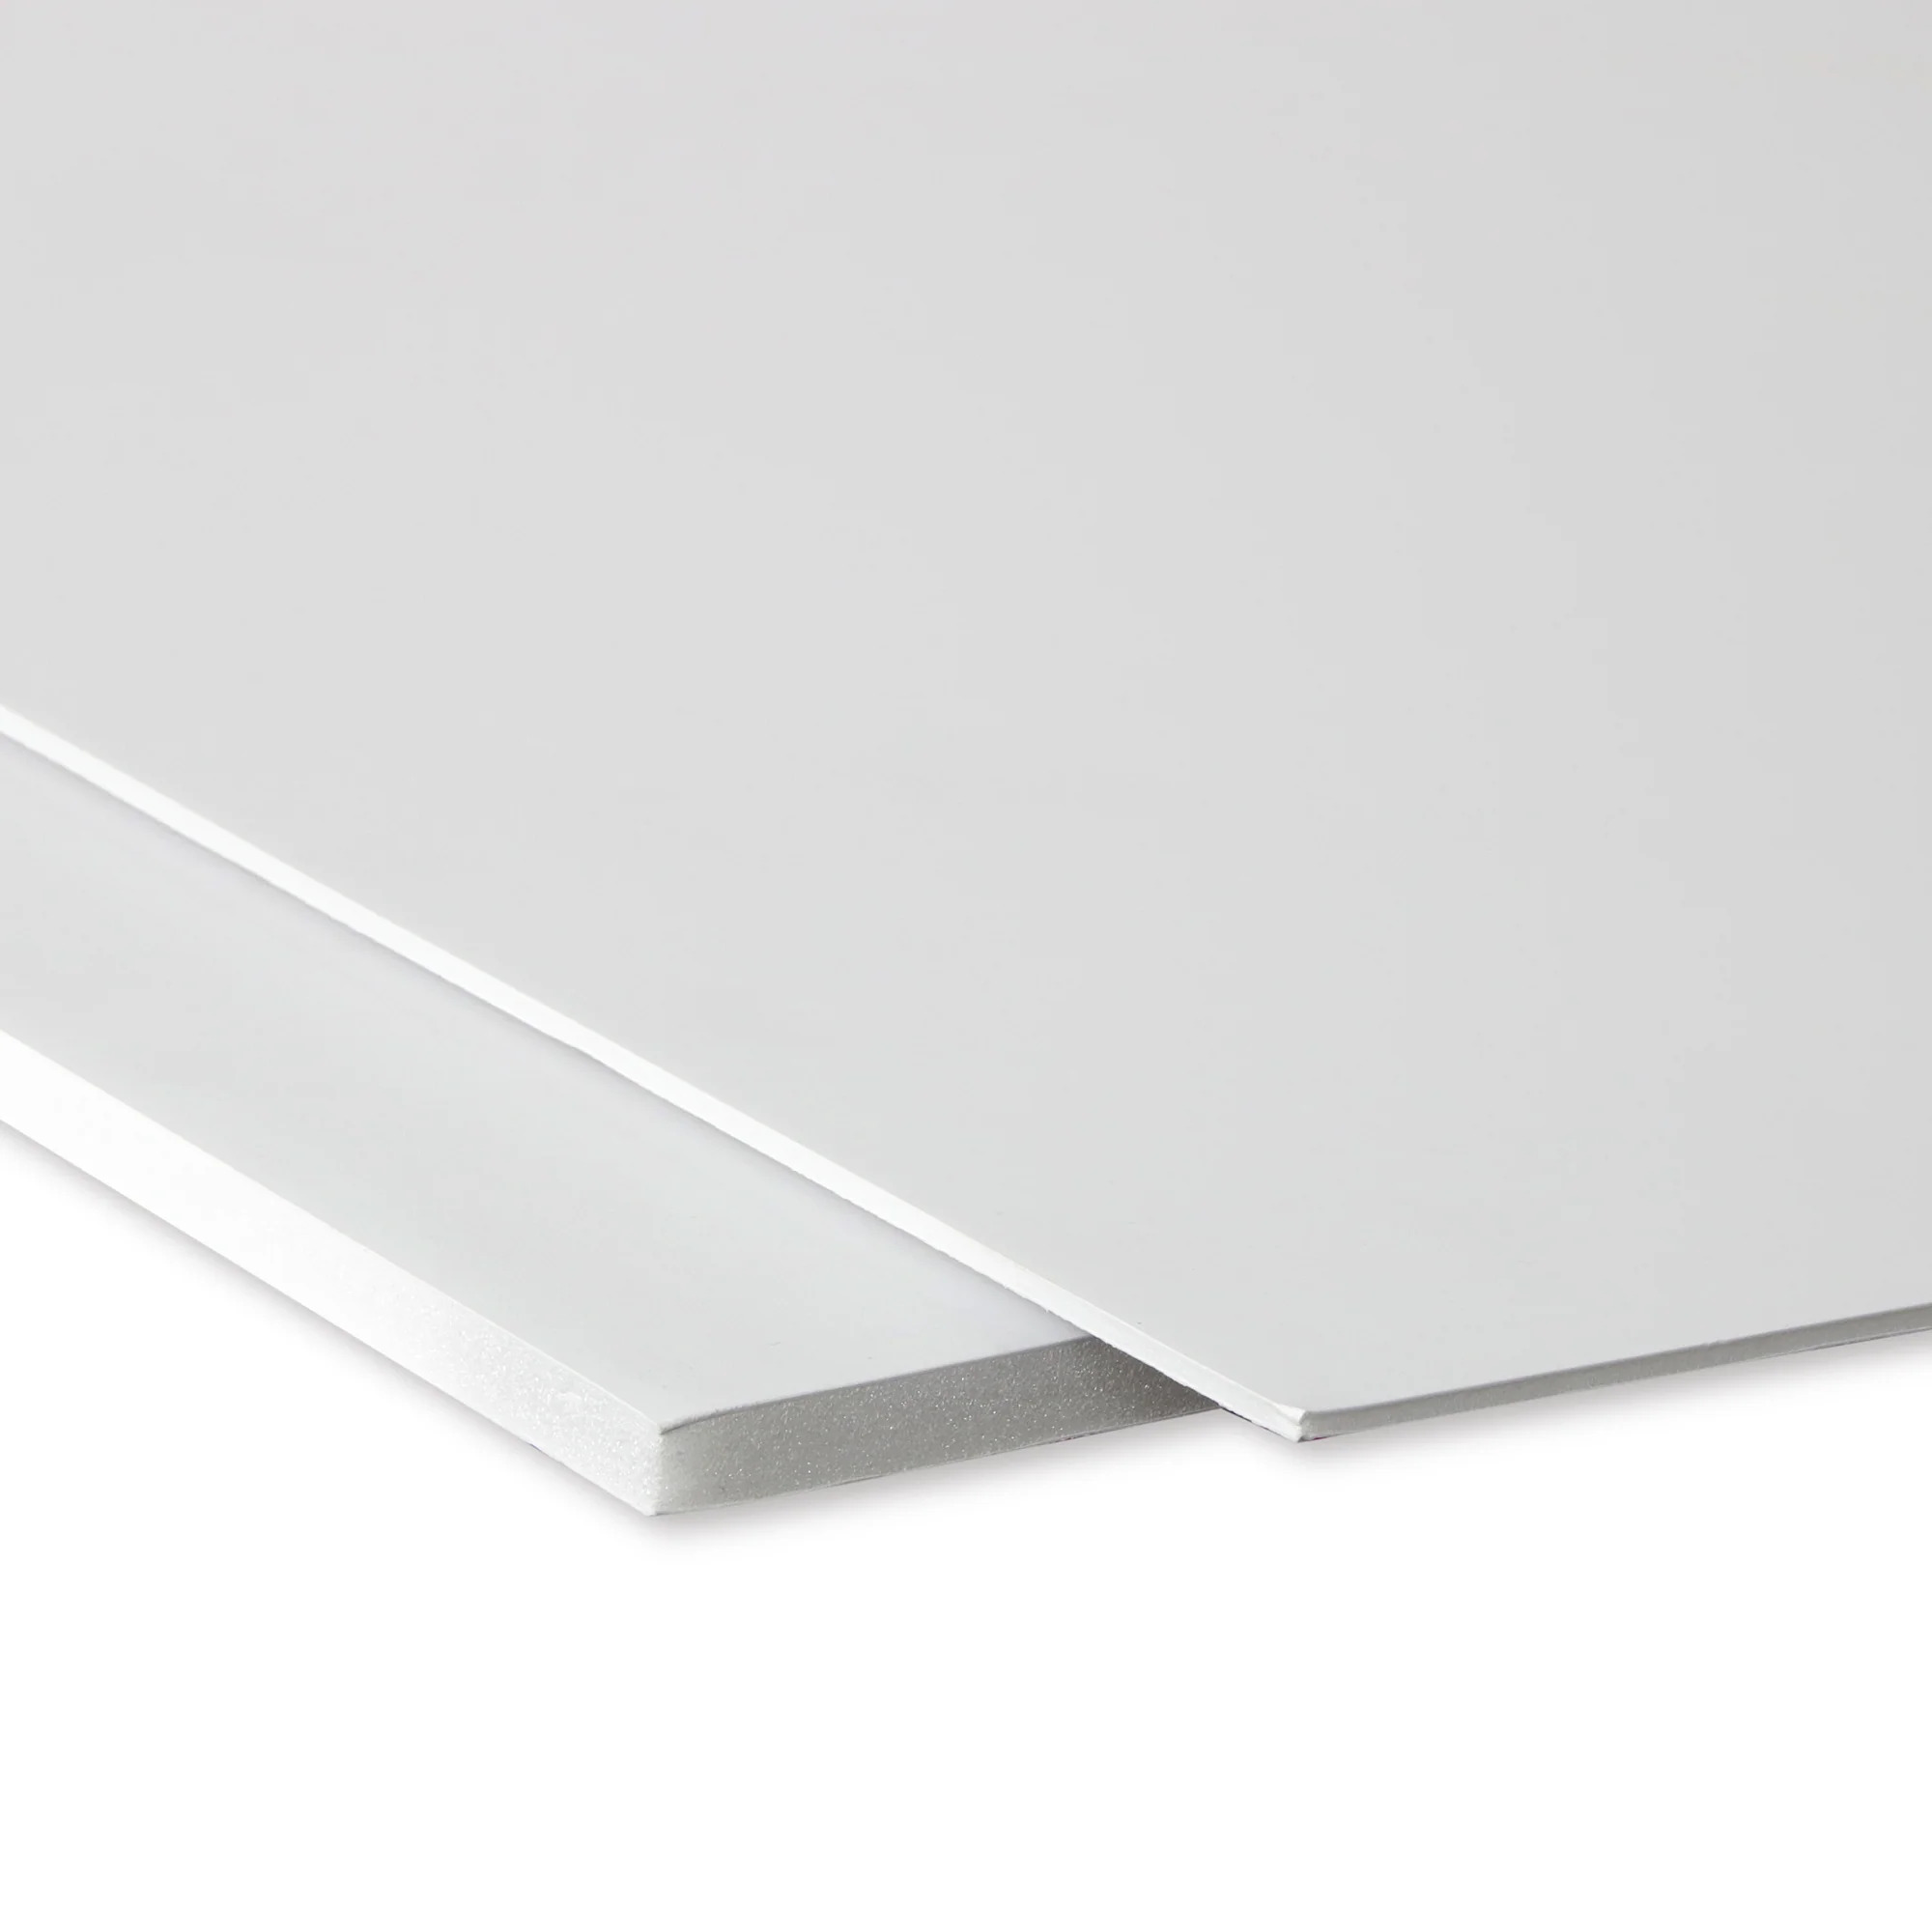 Foam signs (Foamalite Express) are lightweight, rigid, and versatile, making them an ideal solution for indoor signage. More rigid than Correx® and more affordable than aluminium composite, they offer a professional appearance with a smooth matt finish. Perfect for retail displays, promotions, and events, these signs are durable, easy to drill, and simple to mount, providing both style and functionality for a wide range of applications.
Sizes available
Custom sizes available.
A0 33.11″ x 46.81″
A1 23.39″ x 33.11″
A2 16.54″ x 23.39″
A3 11.69″ x 16.54″
A4 8.27″ x 11.69″
20×30 20″ x 30″
40×30 40″ x 30″
60×40 60″ x 40″
Stock Options
1/8″ or 3/16″ Foam
MOST RECENT NEWS
Today's Moment
We have all the equipment, know-how and every thing you will need to receive fast, reliable printing services with high quality results.


